
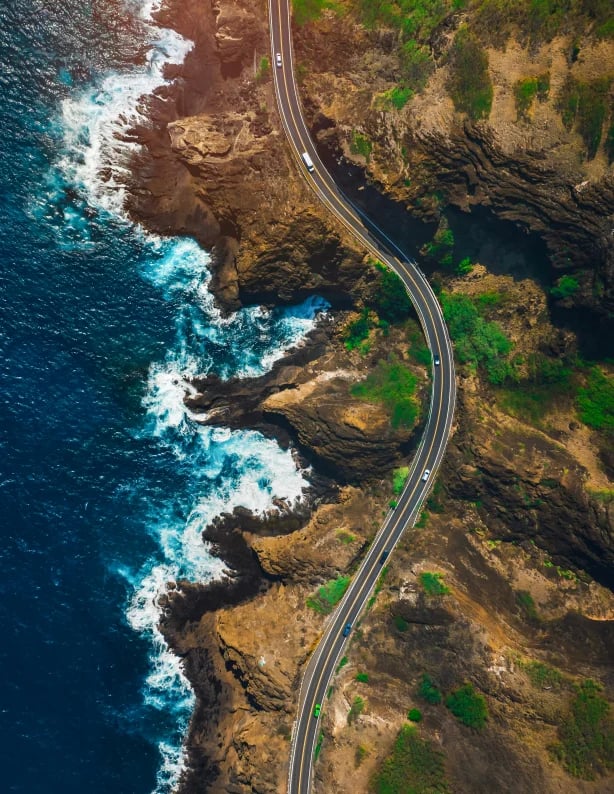
Picture this: You’re standing at the edge of the Cliffs of Moher n Ireland, your drone hovering silently 400 feet above the churning Atlantic.
The morning mist parts, revealing a breathtaking canvas below.
This isn’t just photography anymore – it’s like painting with light from the heavens.
I still remember my first drone flight in 2020, hands shaking as I launched my DJI Phantom 3 Standard into the sky. Today, drone photography has evolved into a new art form.
 img.webp
The majestic Cliffs of Moher from 400 feet above - captured with a DJI Mavic 3 Pro
Beyond the Basics: Mastering Your Drone
Let’s get real about drone photography – it’s not just about getting your drone up in the air.
The latest DJI Mavic 3 Pro, with its triple-camera system, has changed the game entirely. Imagine switching between a 4/3 CMOS Hasselblad camera for those rich landscape shots, a 70mm medium tele for perfect portraits, and a 166mm telephoto lens for those impossible-to-reach details – all while hovering steadily in the sky.
But here’s what most tutorials won’t tell you: the best shots often come from the most unexpected places.
 amazon.webp
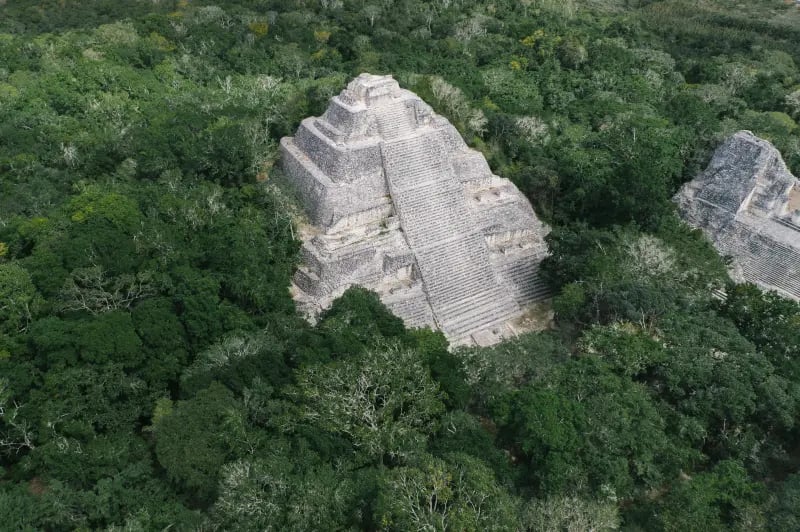
Camp, Mexico - DJI Mini 4 Pro with ND16 filter
‘The key is to think like a cinematographer, not just a photographer,’ says Chen. ‘Every movement of your drone should tell part of the story.’
The latest drones pack some serious tech that makes this easier than ever:
- Omnidirectional obstacle sensing (because nobody wants their $2000 drone meeting a tree)
- AI-powered subject tracking that’s smart enough to follow a mountain biker through dense forest
- Advanced flight modes that can recreate Hollywood-style shots with the press of a button
But here’s my personal tip: start with the “Orbit” mode. It’s simple enough for beginners but powerful enough to create those jaw-dropping circular reveals that never fail to impress.
Exploring Advanced Features
Want to know what separates amateur drone shots from those mind-bending aerials you see on National Geographic?
It’s not just about having the latest gear – it’s about mastering it.
Take hyperlapse, for example. Last month, I captured Dubai’s sunrise-to-sunset transformation using the DJI Mini 4 Pro’s advanced hyperlapse mode. The result? A 30-second masterpiece that made my Instagram explode. The secret wasn’t in the settings (though I’ll share those below) – it was in the planning.
Here’s your cheat sheet for advanced drone moves that actually matter:
MasterShots (The Secret Weapon)
This AI-powered mode is like having a professional cinematographer in your pocket. It automatically executes 10 complex flight patterns while keeping your subject in frame. Pro tip: Use it at golden hour for architectural shots – the changing angles create stunning light plays.
QuickShots Evolution
Remember when QuickShots were just simple orbits? Now, they’re even more powerful:
- Curved Reveal: Perfect for landscape transitions
- Dynamic Boomerang: Now with altitude variation
- AI Scene Recognition: Automatically adjusts parameters for mountains, water, or urban environments
Manual Mode Mastery
Yes, automated modes are great, but here’s why manual still rules:
- Complete control over exposure during changing light conditions
- Ability to execute complex moves that AI can’t predict
- Better handling in tricky wind situations
The Dronespot community forums are filled with pilots sharing their manual mode secrets. Join the conversation – your next breakthrough might come from a fellow drone enthusiast in Tokyo or Toronto.
The Art of Drone Composition: Breaking the Rules to Make Them
Remember learning about the Rule of Thirds in photography class? Well, throw that rulebook out the window – at least temporarily.
Drone photography operates in three dimensions, not two. It’s time to think differently.
The New Rules of Aerial Composition
 surf.webp
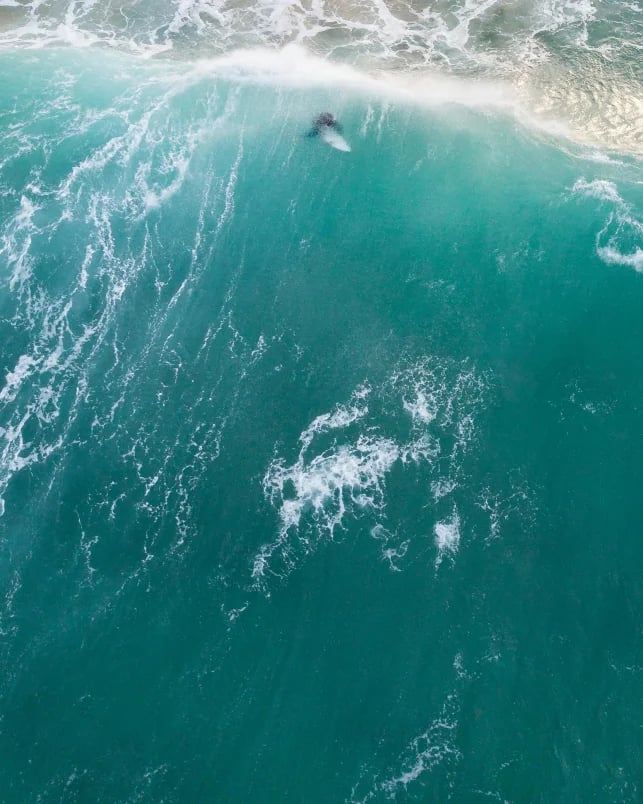
The power of negative space: A lone surfer surrounded by the vast Pacific Ocean - Shot with DJI Air 3
1. The Power of Negative Space
You know that shot of a lone surfer in vast blue waters that went viral last year? That’s negative space working its magic. Try this:
- Position your subject in just 1/6th of the frame
- Let the environment tell the rest of the story
- Experiment with altitude to find the sweet spot
2. Patterns & Repetition: Nature’s Hidden Art
Some of my favorite shots happened by accident. Flying over Barcelona’s Eixample district at sunrise, I discovered how morning shadows transform ordinary city blocks into mesmerizing geometric patterns.
Pro Tip: Use the drone’s map feature to scout locations with potential patterns before you even take off.
Breaking Conventional Rules
The most stunning drone shots often come from breaking traditional photography rules. Here’s what I mean:
🌟 Center Composition
While the rule of thirds is great, sometimes placing your subject dead center creates powerful symmetry. I learned this shooting the Grand Mosque in Abu Dhabi – the perfect symmetry created an almost hypnotic effect.
🌟 Playing with Scale
Try this mind-bending technique:
- Find a massive subject (like a cargo ship)
- Fly high enough until it looks tiny
- Include something familiar for scale contrast
- Watch viewers’ minds explode trying to process the perspective
Advanced Composition Techniques
The drone photography game evolved significantly this year. Here are three techniques that are defining the new aesthetic:
- Vertical Reveals
Start tight on a subject, then pull up dramatically to reveal its context. Works brilliantly for:
- Waterfalls
- Skyscrapers
- Forest canopies
- Layer Stacking
Like a sandwich of awesome:
- Foreground: Detailed texture
- Midground: Your main subject
- Background: Epic vista
- Top layer: Interesting clouds or sky
- The Tilt Shift Effect
Modern drones can simulate this in-camera:
- Makes real scenes look like miniatures
- Perfect for city shots
- Creates a unique, dreamy quality
Remember: These aren’t just rules – they’re starting points for your creativity. The best shots often come from knowing the rules well enough to break them intentionally.
RAW Power: Unleashing Your Drone’s Full Potential
Why bother with RAW when JPEGs look fine?
I hear this question all the time, and I get it. JPEGs are convenient, take up less space, and look decent right out of the camera. But here’s the thing…
Last summer, I was shooting the Norwegian fjords at sunset. The scene was challenging: dark water, bright sky, and shadows in the cliffs. In JPEG, I would have lost either the detail in the clouds or the texture in the rocks. RAW saved the day.
The RAW Advantage: By the Numbers
Modern drone sensors can capture:
- Up to 12.6 stops of dynamic range in RAW (DJI Air 3)
- Only 8-9 stops in JPEG
- 12-bit color depth vs. 8-bit in JPEG
Translation? That’s 68 billion possible colors versus 16 million in JPEG. Yeah, billion with a ‘B’.
Real-World RAW Benefits
- Recovery of Blown Highlights
Ever shot a sunrise and lost all detail in the sun? RAW files typically retain 2-3 stops more highlight detail than JPEGs. - Shadow Details
Those dark areas under trees or in building shadows? There’s often usable image data hiding in there – if you shoot RAW. - White Balance Freedom
Got the white balance wrong? No problem in RAW. It’s like having a time machine for color correction.
Storage & Workflow Tips
Here’s how to manage those bigger file sizes:
- A 48MP RAW file is about 80MB
- Get a high-speed memory card (V30 minimum)
- Consider DJI’s RAW compression option
- Back up to cloud storage between flights
Pro Tip: I keep two microSD cards in my drone bag. When one fills up, I swap it out and use my phone to start uploading to cloud storage while I continue shooting.
Post-Production Magic: Where Good Shots Become Extraordinary
 photo-before.webp
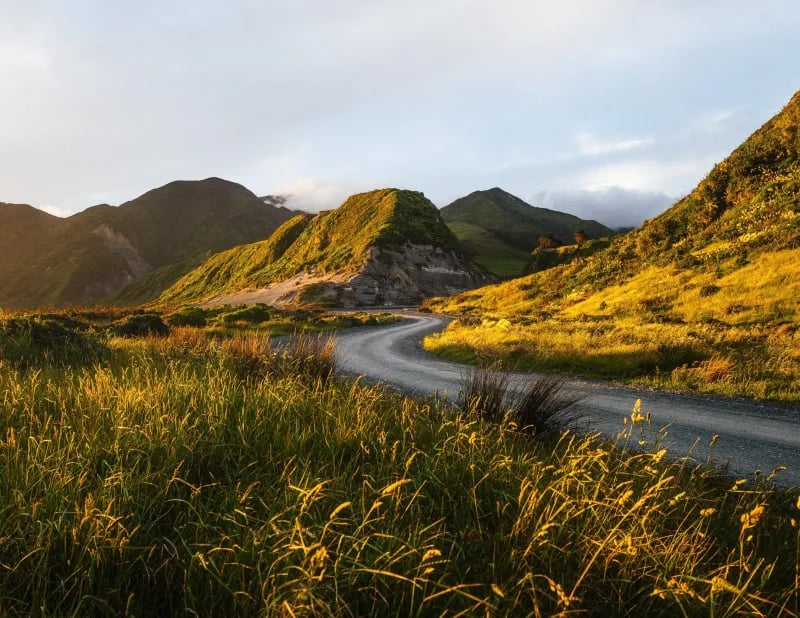 photo-after.webp
Before/After: The same coastal sunset shot. Left: Original RAW file. Right: Final edit with recovered shadows and enhanced colors
Let’s talk about the dark arts of drone photo editing.
(Just kidding – it’s not dark at all, but it is magical!)
My Editing Workflow
The game has changed. My today’s drone editing workflow is all about efficiency and simplicity. Here’s my current setup:
- First Pass: Lightroom Mobile
Right on my phone, minutes after landing:
- Basic exposure adjustments
- Horizon straightening
- Quick color tweaks
- Share preview with clients/Instagram
- Deep Edit: Lightroom Classic
Back at the computer for the real magic:
- Detailed shadow recovery
- Advanced color grading
- Perspective corrections
- Local adjustments
Advanced Editing Techniques
Here’s where your drone shots can really stand out:
- Sky Replacement Done Right
Yes, Photoshop’s AI sky replacement is amazing, but use it wisely:
- Match the light direction
- Adjust the reflection in water
- Blend edges naturally
- Only when necessary!
- Perspective Blend
A technique I developed for cityscapes:
- Take multiple shots at different heights
- Blend in Photoshop
- Create impossible perspectives
- Maintain realistic lighting
- Color Harmony
The secret sauce:
- Use color wheel theory
- Create custom color grading panels
- Save presets for your style
- But tweak for each image
The Ethics of Editing
Let’s address the elephant in the room: How much editing is too much?
My rule of thumb:
- Enhance, don’t fabricate
- Be transparent about major changes
- Keep it believable
- When in doubt, create two versions
Remember: The goal isn’t to create fantasy – it’s to show reality at its most compelling.
ND Filters: Your Secret Weapon for Cinematic Shots
“Do I really need ND filters for my drone?”
If you’re asking this question in 2025, the answer is a resounding yes – but maybe not for the reasons you think.
The ND Filter Revolution
Remember when we had to stack multiple filters and pray they didn’t fall off mid-flight? Those days are gone. The latest variable ND filters from PolarPro and Moment are game-changers:
- Magnetic attachment systems
- No light leak issues
- True neutral color cast
- Range from ND4 to ND64
Real-World Applications
Let me share with you three magical moments where ND filters transformed my shots from ordinary to extraordinary.
Last week, I found myself at the edge of Thor’s Well in Oregon, that mysterious sinkhole in the Pacific. Without an ND filter, my drone captured the water frozen in time at 1/2000 of a second - clinical, but lifeless. Then I attached the ND64, slowed the shutter to 1/15, and watched as the churning waters transformed into silk, telling the true story of nature’s fluid dance.
The urban landscape offers its own canvas. Hovering above downtown at dusk, my ND16 filter turned streams of traffic into ribbons of light. At 1/15 of a second, with ISO 100 keeping the noise at bay, the city revealed its pulse - each light trail a story of someone’s journey home, creating hypnotic patterns that speak of urban life’s endless flow.
Perhaps most surprising is how ND filters breathe life into architectural photography. Modern glass buildings can be harsh and unforgiving at midday, but with an ND8, they become mirrors to the sky. The manageable exposure preserves every detail in those reflective surfaces, while clouds drift across their glass faces like dreams. What was once a static structure becomes a dynamic interplay of earth and sky.
Filter Selection Guide
2025 Top Picks:
-
PolarPro Variable ND (ND4-32)
Perfect for: DJI Air 3, Mini 4 Pro
Price: $149.99 -
Moment Variable ND (ND4-64)
Perfect for: Mavic 3 Pro
Price: $119.99 -
Freewell All-Day Filter Set
Perfect for: Budget-conscious shooters
Price: $79.99
Pro Tip: Always carry a lens cloth. Clean filters = sharp images.
Advanced ND Techniques
- The 180° Shutter Rule
For video, shutter speed should be:
- 2x your frame rate
- 1/60 for 30fps
- 1/100 for 50fps
- ND filters make this possible in bright light
- Long Exposure Photography
Creating dreamy landscapes:
- Start with ND64
- Base ISO 100
- Experiment with 2-4 second exposures
- Use drone’s tripod mode
Remember: ND filters aren’t just tools – they’re creative enablers. They give you control over motion and light in ways that transform ordinary scenes into extraordinary images.
Weather Wisdom: Flying Smart & Safe
 photo-colorado.webp
The moment before I had to make an emergency landing in Colorado - Always respect weather conditions
Let me tell you about the time I almost lost a $2,000 drone to a sudden mountain storm in Colorado.
(Spoiler: The drone survived, but I learned some valuable lessons!)
Understanding Weather Patterns
Modern drones are tough, but they’re not invincible. Here’s your weather survival guide:
Wind Speed Wisdom
- DJI Mini 4 Pro: Max 24mph (Level 5)
- Air 3: Max 27mph (Level 6)
- Mavic 3 Pro: Max 33mph (Level 7)
But just because you can, doesn’t mean you should. I stick to 70% of max wind speed for smooth footage.
The Weather Window
Perfect conditions aren’t just about clear skies. Here’s what I check before every flight:
- Primary Conditions
- Wind speed and gusts
- Precipitation chance
- Cloud base height
- Visibility
- Secondary Factors
- Temperature (affects battery life)
- Humidity (lens fog risk)
- Air pressure (altitude limits)
- UV index (filter needs)
Pro Tip: I use UAV Forecast app and cross-reference with local weather stations.
Seasonal Shooting Guide
Spring
- Morning fog opportunities
- Watch for sudden showers
- Bird migration patterns
- Perfect for landscape transitions
Summer
- Early morning/late evening flights
- Heat affects battery life
- Thermal updrafts near cliffs
- Watch for summer storms
Fall
- Best color opportunities
- Stable morning conditions
- Earlier sunset times
- Less thermal activity
Winter
- Reduced battery life
- Snow reflection issues
- Clearer air quality
- Unique lighting opportunities
Emergency Weather Protocols
When things go wrong (and they will), follow this checklist:
- Sudden Wind Gusts
- Switch to sport mode
- Head directly into wind
- Reduce altitude
- Return home at 45° angle
- Unexpected Rain
- Initiate RTH immediately
- Maintain visual contact
- Land ASAP
- Dry thoroughly before storage
- Cold Weather Ops
- Keep batteries warm
- Start with 100% charge
- Hover 30 seconds before flight
- Keep flights under 15 minutes
Remember: The best drone pilots aren’t the ones who never face bad weather – they’re the ones who know when to keep their drone on the ground.
Embracing Exploration and Creativity
At the heart of it all, the joy of drone photography is the feeling of exploration.
With Dronespot, you can connect with a community of like-minded photographers and share your experiences.
Sure, you need to stay cautious and follow the rules.
But there’s that thrilling moment when your camera ascends, and you see your surroundings from an angle typically reserved for birds.
It’s creative and technical at the same time, offering new ways to tell visual stories.
Don’t be discouraged if your early photos or flight maneuvers feel shaky.
With practice, you’ll figure out how to line up the perfect shot and control each subtle tilt of the camera.
Over time, you’ll learn whether you prefer sweeping cinematic movements, dramatic top-down angles, or gentle reveals that peel back a hidden scene.
So whether you’re buying your first entry-level drone or stepping up to a pro model, keep experimenting.
Hone your pilot skills, pay attention to your camera settings, and always keep safety in mind.
Drone photography is an evolving art form that challenges your technical abilities and your creativity in equal measure.
As you refine both, you’ll find yourself capturing images that make people’s jaws drop.
And that’s when you know you’re truly mastering the skies.
Your Journey Begins: From Novice to Aerial Artist
I still remember that feeling of pure joy when I first launched my drone – a mix of excitement and terror as $1,000 worth of technology hovered uncertainly in front of me.
Four years and thousands of flights later, that joy hasn’t diminished one bit. If anything, it’s grown stronger.
Why Drone Photography Matters
In 2025, we’re not just taking pictures anymore. We’re:
- Documenting our changing planet
- Creating new perspectives on familiar places
- Sharing our adventures with friends and family
- Inspiring the next generation of aerial artists
- Pushing the boundaries of what’s possible
Your Next Steps
Ready to level up your drone game? Here’s your action plan:
- Join the Community
- Create your Dronespot profile today
- Discover incredible locations to take the best shots
- Share your first shots
- Build Your Skills
- Master one technique at a time
- Practice in open spaces
- Record your progress
- Learn from your mistakes
- Develop Your Style
- Experiment with different heights
- Try new perspectives
- Find your signature look
- Push creative boundaries
Final Thoughts
Remember: Every expert was once a beginner. Every stunning shot you see online started with someone deciding to try something new.
Your journey in drone photography is unique. Whether you’re capturing the grand vistas of national parks or the quiet beauty of your local neighborhood, you’re contributing to a new way of seeing the world.
So charge those batteries, check the weather, and get out there. The sky’s waiting for you.
And don’t forget to share your adventures on Dronespot – I can’t wait to see what you create.
About the Author: I’m a passionate drone photographer and founder of Dronespot.
You can reach me by email at [email protected]
